netlify持续部署hexo博客

流程
- 本地GIT提交到github或其他仓库
- github通过webhook之类的方式通知netlify拉取最新版的的文章
- netlify拉取,编译
- 等待1分30秒左右
- 刷新看下更新后的博客
好处
- 免费,支持htpps,无广告
- 开放性强大,可以配合AWS Lambda函数等
- 便捷,写博客不限制于本地的环境
与Coding对比
- coding使用Tencent香港服务器,netlify使用AWS新加坡服务器
- netlify比较简单,不需要太多设置既可以支持Jekyll,Grunt,Middleman,Hexo,Hugo,Gatsby,VuePress。coding则需要对Docker有一定了解才能自定义
- 建议:已备案推荐netlify配合upyun,快到飞起。未备案则就coding吧
准备
- 一个github或gitlab或bitbucket账号
- 一个hexo或者其他类型的博客,若没有则建议Fork下hexo-template
开始
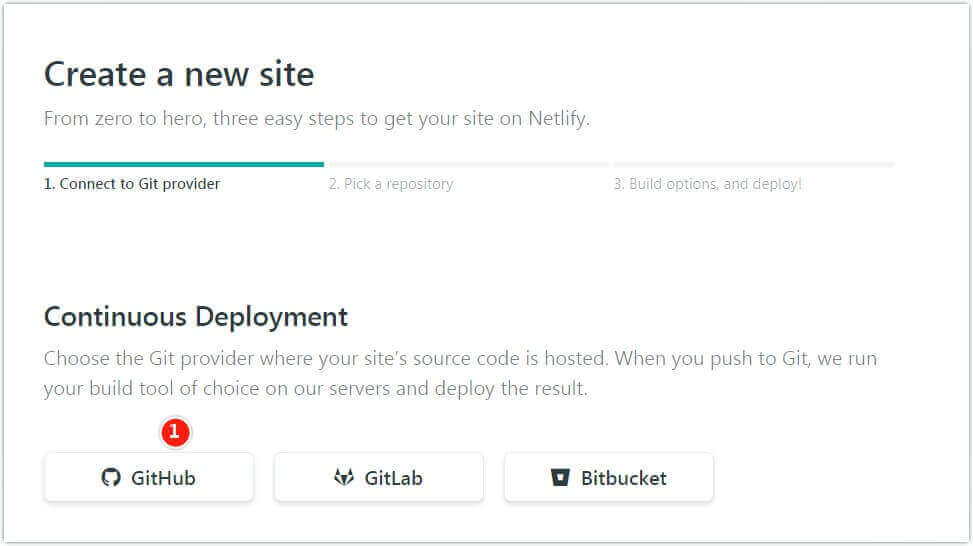
打开netlify网站,用你的github账号登录
点击New site from Git,在Create a new site中选择你的git仓库账号,博主的时Gihubt,如下图所示
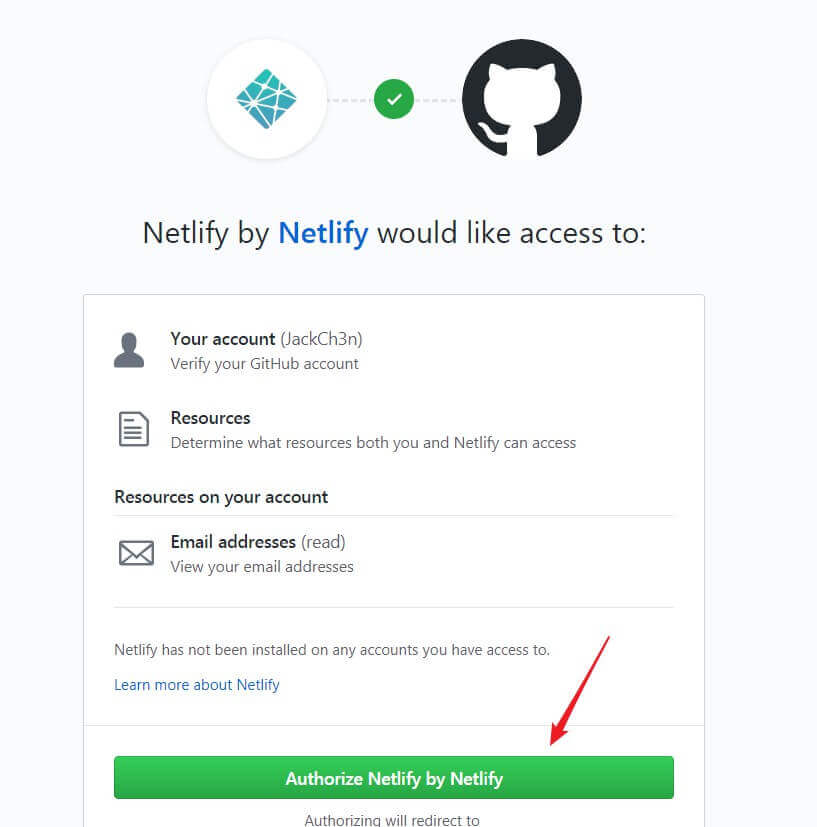
在弹出来的授权信息点击Authorize Netlify by Netlify,如下图所示
在Install Netlify页面中选择Only select repositories,然后选中刚刚Fork的hexo-template或是你自己的仓库,如下图所示
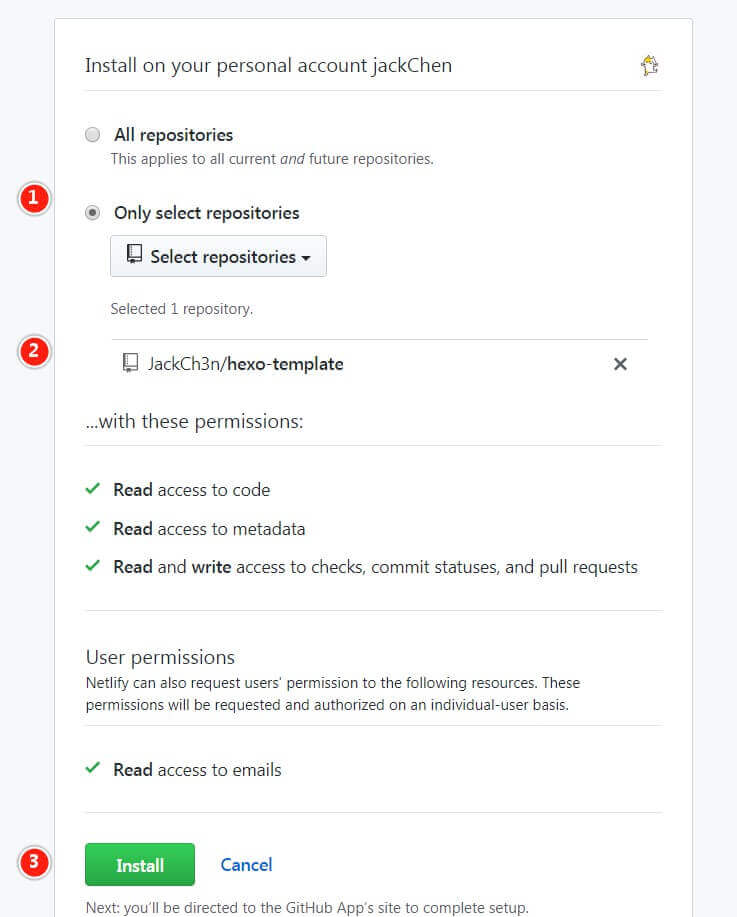
点击 JackCh3n/hexo-template
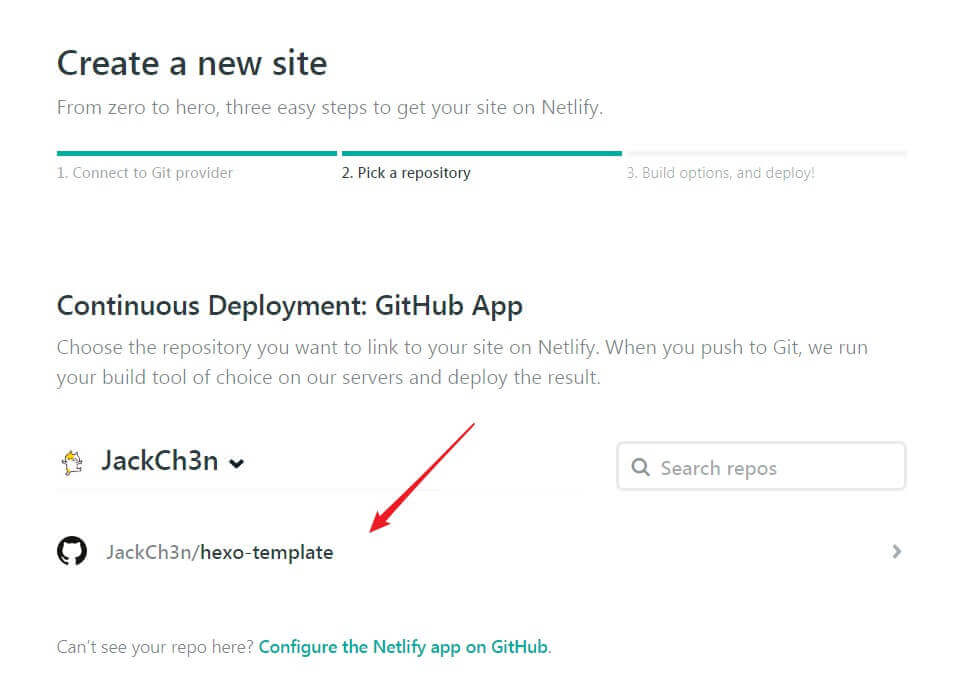
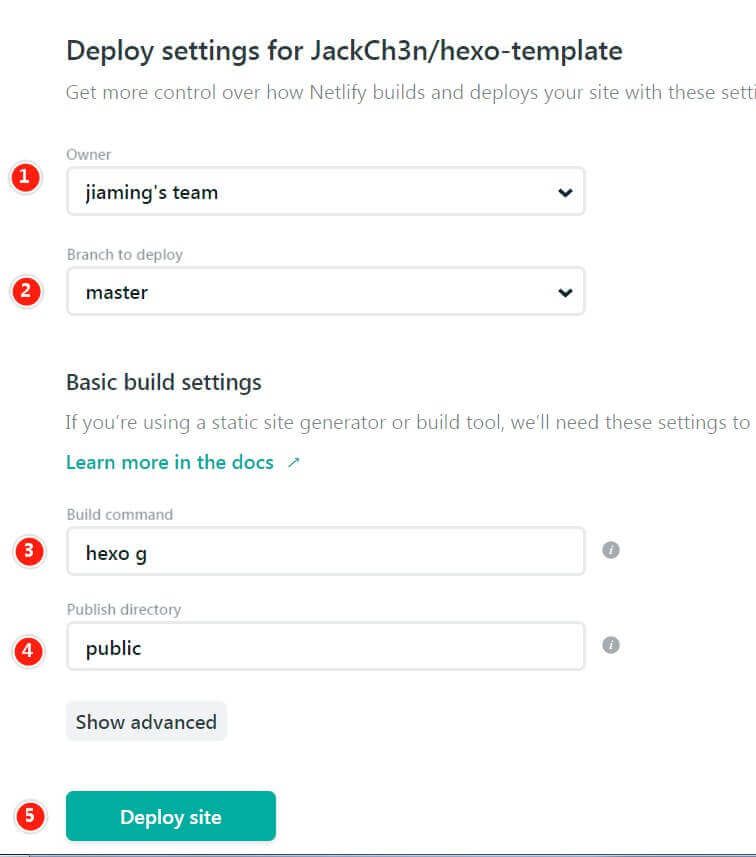
选择团队和分支,Build command填写hexo g,Publish directory填写public即可点击Deploy site完事了。
后会跳到网站的详情页面,如下图所示
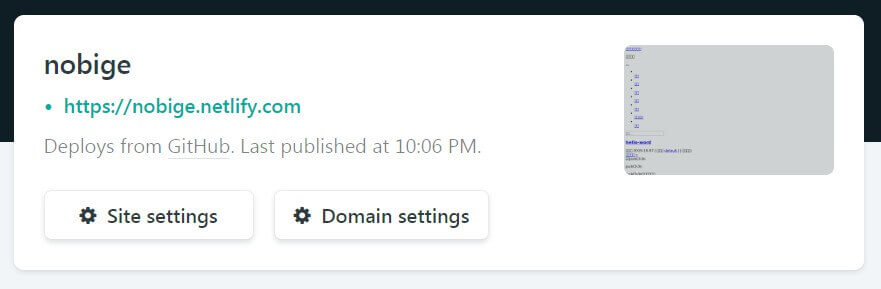
可以根据自己的需求来绑定域名和一些其他设置,如果你是Fork的hexo-template则可以修改netlify.toml来实现http跳到https以及netlify的域名转跳到你的域名。
绑定域名
在Domain management,Custom domains,Add custom domain新增一个
自己的域名,然后CNAME指向他给你域名即可,如给我的是nobige.netlify.com。
https
绑定域名后可以在Domain management,HTTPS,开通
http跳https
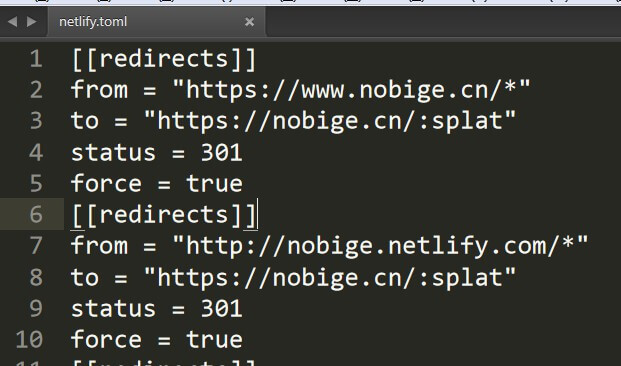
可以参考netlify.toml文件,基本规则如下
1 | [[redirects]] |
预览
自己动手建一个呗